Friday, May 4, 2012

Pretty Castle


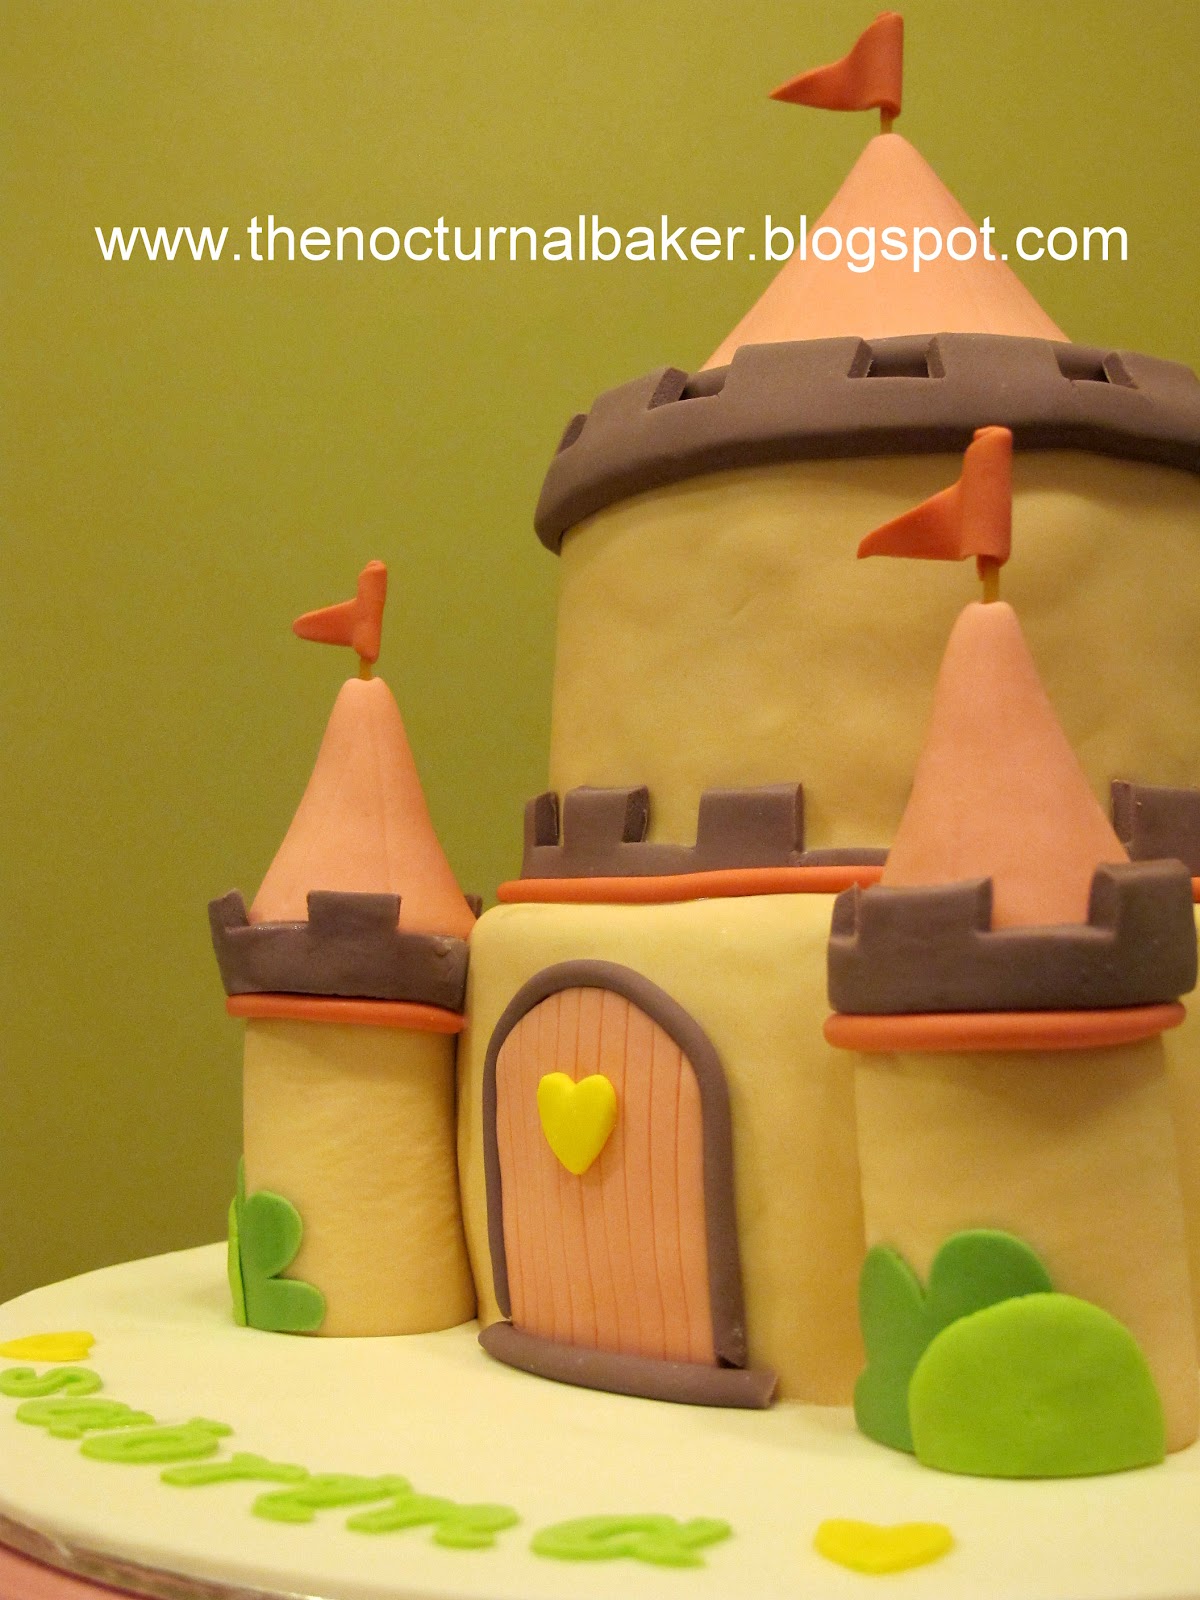
My daughter Claire was invited to a birthday party. I didn't know what to get the birthday girl, as usual, so I thought I'd make the cute princess castle which was on the invitation card. It was simple and pretty!


The cake is a small 6" chocolate cake at the bottom and the top tier is an even smaller 4" round chocolate cake. The two towers are purely gumpaste. The flags are made of modelling paste.


Modelling paste is fondant strengthened with CMC (carboxymethylcellulose) powder. I think I prefer CMC to gum tragacanth, as it can be used instantly after mixing, unlike gum, where you have to let it rest for a few hours after mixing before you can use it. Since I am forever lacking enough time, anything that saves time gets a thumbs up from me!


It's funny how when I first learned about CMC, it was for a totally, totally different use! It was our group project in uni (pharmacy degree), we were doing different drug delivery methods and we got ocular inserts! It means we had to explore the fairly un-used method of delivering drug into the eye by using eye inserts! (ie. putting something into the eye like contact lens)

So we dissolved the medicine and added CMC to thicken and bind it together and let it dry into a paper thin piece of medicine which could be put into the eye! Cool eh? Unlike eye drops, it could dissolve slowly, thus delivering drug steadily into the eye, over a longer period of time. A guy from Pfizer came and judged ours the best project and we got free Pfizer t-shirts! lol!

And here I am now using CMC to make cakes!! Which I enjoy so much more by the way!! ;)

Okay, sorry for the detour, back to the cake...


For the name, I used FMM tappits. The tappits can be a pain to use, but if you know these simple secrets, it becomes a breeze!

1. use gumpaste, not fondant
2. roll it out really thin
3. use plenty of cornflour, on the top and bottom of the gumpaste and also flour the FMM mould!

The pretty alphabets you get in the end are definitely worth it!


Tuesday, April 10, 2012

Mickey Mouse Clubhouse


So a fellow pharmacist's son was celebrating his very  first birthday and Mummy wanted me to make a cake. Baby Joel (love that name) apparently likes Mickey Mouse, so we decided on a Mickey mouse Clubhouse cake plus cuppies.

The top tier of the cake is the ever popular dark chocolate cake with a Belgian chocolate ganache filling and covering. The bottom tier is a polystyrene dummy, just to add height and 'grandeur' to the cake! Real cake for the bottom tier would have been way too much cake.


The cake was covered in soft fondant and 2D decor also done with soft fondant. The top of the cake was adorned with candles which Mummy passed to me. It was a little crowded but still great anyway.


The cupcakes were also the same flavour and covered with soft fondant. I got to try out my Mickey cutters which I've had for a while now, but never had the chance to use yet. But I'm not worried that my cutter will get outdated, cause Mickey Mouse is timeless, and my guess is; my grand kids will still  be watching some form or another of Mickey Mouse!! :)

Wednesday, April 4, 2012

Cheap Cake is not Good Cake?

I came across this quote: 

"Cheap cake is not good cake"

 and I couldn't agree more!

Why are premium cakes expensive?

Well, on top of the many, many, many hours (days usually) which we put into decorating a unique fondant cake, we also use the best possible ingredients.

I work in the healthcare industry (pharmacist) and am also a mother of four. I am therefore well aware of the myriad of  chemical additives which go into store-bought processed food and also cheap bakery products.

Among the chemicals commonly used are;
  • Preservatives, which make the products last longer. 
  • Emulsifiers (eg: Ovalette) which produce a wonderfully soft and smooth texture to cakes and many other food products. 
  • Anti-mold which prevents mold growth, especially in breads. Without this chemical, the common white sandwich bread would grow moldy in a day! 
There is also plenty of trans fat (the worst kind of fat) hidden in margarine and shortening. Look carefully before buying "butter", as some are not butter at all, but misleadingly labelled to make the consumer think it is butter! Many are made of vegetables oils which have gone through a chemical process (hydrogenation) to turn them into solids and coloring is added to make it a butter yellow! *serious* These are loaded with harmful trans fat due to the chemical processing. Real butter is expensive and less stable, so most bakeries use margarine or shortening.

This is why I try not to buy bakery products too often for my kids. Whenever possible, I make my own. So, knowing all this, I cannot in good conscience feed my clients junk either.

These are some of the premium ingredients I use whenever possible. (In this small town, steady supply is unfortunately never guaranteed!)


Anchor butter is pure New Zealand butter made from real milk. It is also certified halal. Through experience, I can attest that it has less water content compared to some other brands, and is thus denser, richer and creamier!


Van Houten cocoa powder is luxuriously dark and robust in flavour! It is made in Holland, and Van Houten invented the famous Dutch process for producing cocoa powder. I have used other cocoa powders  like Hershey's and just by comparing the colour, I can tell that Van Houten is the superior product. Hershey's is a light brown colour, whereas Van Houten is a gorgeously rich, deep, dark brown.


Belcolade dark chocolate discs from Puratos Inc., Belgium. This is a gloriously decadent, real Belgian chocolate. I love chocolate, in case you haven't noticed, so none of that cheap slimy stuff for me thankyouverymuch.

 I use this chocolate to make my ganache and my kids will always be hanging around like vultures waiting for leftovers! lol!


Satin Ice is an American fondant/ sugarpaste. It's texture and taste make it my favourite fondant to use. It is correspondingly the most expensive, and to top it off, not available here! I have to get it from KL whenever I can. Otherwise, I use the next product...

Bakel's pettinice is also a good fondant, but is sometimes too soft for our weather. It tastes good though and is usually available here. It is a product of New Zealand.


Anchor cream cheese is rich, thick and creamy. I use a lot of it for my cream cheese frosting. Through experience I found that cheaper alternatives, like Tatura cream cheese, are higher in water content and produces a watered down frosting.


Kampung eggs (free range, organic eggs) are a beautiful thing. Their yolks are yellower, and the texture of the egg on the whole is firmer and denser compared to the more abundant, mass-produced ones. Though I must admit, they're not always easy to find. Sometimes they're available pre-packed at the supermarket, though I usually get them from the 'egg uncle' at the Stutong Market. (I have him on speed dial) But most times I have to use regular eggs.


A good cake starts off with good ingredients. It truly does make a difference.

Tuesday, April 3, 2012

Alastair & Esther


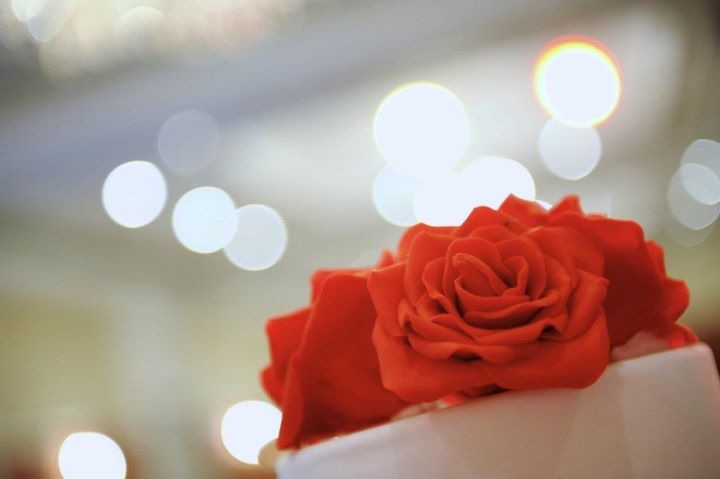
So the first cake for 2012 was a wedding cake for Alastair and Esther. It was a two-tiered cake, with extra deep tiers. The cake was a moist red velvet cake with a light cream cheese frosting.

The bride had a red rose featured on her dress, according to the groom, so I was to replicate that on the cake. They also gave me a porcelain topper to place on top of the cake.


So since the theme was red and white, I covered the cake in white soft fondant and framed the bases in red satin ribbon. A huge, red gumpaste rose was secured to the side. I also added small pink blossoms, trailing around the cakes. I did not want the blossoms to be red, so that the rose would stand out.

The cute Betty Boop-like topper completed the whole ensemble.


I had to go to the restaurant to do the set up. Luckily Annie came with me to help carry some of my things. Thanks dear :)


Monday, April 2, 2012

Gingerbread house in April!


Heh.

My apologies. It is April, with Easter fast approaching and I am only now writing about the gingerbread house I made December last year!

Well, as they say, better late than never eh?

 Anyway, this time around, I made the royal icing using meringue powder, and it didn't quite stiffen up very well. It ended up slightly  runny and took ages to dry!! The year before, I used real egg whites and the royal icing turned out really good.

I'm not sure if it's the powder, or whether it's about time I got myself a proper Kitchen Aid or Kenwood standing mixer! Right now I'm still using my trusty ol' hand-held mixer....


Okay, for those who live in tropical climes like me, here are a few tips I learned the hard way!!

1. Do not stick on hard candy. They will melt and drip and make a mess all over! Use gummy sweets and      candy coated chocolates instead, or sweets still wrapped in their wrappers (like plastic wrapped candy canes). Here I used gumpaste to make the candy canes and wreath. That seems to work best.

2. Do not use biscuits either! I used those wafer rolls once as pillars for the house and they just softened and shriveled up in the humidity!

3. Make sure your royal icing is really stiff! Otherwise your gingerbread house will be falling apart and you'll have to support it for ages while it takes it's sweet time hardening!

4. I know a nice sloping roof with a long overhang gives a quaint 'cottage-y' look, but beware! I did that and after a couple of days, the gingerbread softened in the humidity and bits of roof that extended beyond the wall started dropping off!!!! *horror*!!

So, as you can see, I have not yet perfected the art of gingerbread house-making (far from it in fact)... But I will let you know whenever I learn anything new!

Can't wait till next Christmas!! ;)

Patrick the red dog


I get Patrick the red dog and Clifford the BIG red dog confused sometimes! Hahaha... what's with red dogs anyway I wonder!! :)

Anyway, our close friends were celebrating their son Jaeden's very first birthday, so I was asked to make a Patrick cake. Patrick is pretty simple to make, I must say, since he's all floppy like!


So I made a two tiered cake, 8" and 6". The bottom tier was a polystyrene dummy and the top tier was a dark chocolate cake filled and iced with Belgian chocolate ganache. (yummy, trust me...)

 Both tiers were covered in soft fondant and Patrick was made of gumpaste and plopped on top!

Thursday, March 22, 2012

Professional photographs


I just had to post these photos! It's amazing how a professional photographer can make your creations look so good!!!

These were taken by Edwin Lay Photography during Jerome and Belle's wedding in my last post. I sure wish I could take photos like these...

The quality isn't so great cause I saved these off Facebook.


The frantic last-minute piping! I seldom get shots of me at work, since I can't photograph myself... So this is nice, even though it just show's my hand! lol


See? This is what I mean; why didn't I think of shooting from this cool angle??


Orange chocolate cake balls coated in Belgium chocolate. Orange and chocolate are one of my favourite flavour combinations!!


Vanilla almond sugar cookies iced with fondant and embossed with "A & J", using a stamp I had made.


Sweet... can't wait till the next dessert table...

Friday, February 17, 2012

Jerome & Belle


A couple of our good friends tied the knot last December. I had the honour of making their wedding cake as well as preparing a dessert table! This was my first try at a full dessert table and I was mega excited! I love ogling at the dessert tables on My Sweet & Saucy and Amy Atlas' blogs. Gorgeous, gorgeous, gorgeous....

Well anyway, Belle loves butterflies, and the theme was red and gold. So we came up with a three deep-tiered cake design, incorporating red roses, red ribbons and gold butterflies.


I started making the roses and butterflies a few weeks ahead of the event. The workshop with Alan Dunn helped a lot when it came to making the roses. I tried making them as huge as possible. It was a lot of tedious work, but the resulting roses were beautiful.


I cut the butterflies using my Patchwork cutters. I then let them dry on folded paper and dry brushed them with gold luster  powder.

The top two tiers are polystyrene dummies. I find since I am a one man show, I do not have enough time to use real cakes for huge orders. We want the cakes to be as fresh as possible, yet we need plenty of time to perfect the decoration. So I think that using dummies is a good compromise. I would of course love a wholly edible cake, but until I have a whole team of bakers working for me (and not to mention proper, big ovens) this will have to do! Hahaha...

Anyway, the bottom tier was a lovely, moist orange cake with chocolate ganache frosting. The bride didn't want too much cake anyway, since there was already going to be a dessert table.


So that was the cake.


Here's the dessert table. We arrived a little late, and I was frantically working to finish the setting up before guests arrived. I did not know how to transport so many cupcakes, so I iced them there on site! Luckily Hubby was there to give me a hand! We were still doing the final touches when guests started arriving! That's why I didn't get any decent photos!


I made chocolate and red velvet cupcakes, orange chocolate cake pops and vanilla almond sugar cookies. The cookies were heart shaped and embossed with the letters J & A. I also placed some peppermints in a nice glass stand and red roses in a glass vase.


The display cake on top of the cupcake stand was designed to tie in with the wedding cake decor. This too was made from a polystyrene dummy.

I do love dessert tables and can't wait for the next opportunity to do another one!

Monday, January 9, 2012

My Little Pony


I have more confidence now to accept orders which seem trickier. So, when a request came in for a 'My Little Pony' cake, I accepted. An upright pony and a free standing rainbow would have been disastrous a year ago, but now it was a possibility!!


So my friend wanted a Little Pony cake for her daughter. She gave me a picture to work with and specifically wanted a rainbow, a pony and the number 9. I kinda stuck on the number 8 before I realised my mistake and luckily it hadn't stuck on fast yet! Heh...

Well, the rainbow was made from ropes of pastel coloured gumpaste. I threaded the ropes with wire for extra support and bent them into a rainbow and left them to dry for a couple of days.


The pony was kinda tricky and I just winged it. I especially love how the tail and mane turned out. The curls and colours are really pretty. I used the same technique Lorraine taught us for making hair. The butterfly tattoo on the butt and the heart on the hoof was a failure though. I need to work on my painting techniques. The borders are not well defined and the color ran.


In the end, when everything came together, I was satisfied. The pink of the cake and the purple of the cake board was a little dull though. That's another area I need to work on, colouring my fondant.

Tuesday, December 20, 2011

60th Birthday


A friend of mine wanted a cake and cupcakes for her dad's 60th birthday. She wanted a simple cake and cupcakes decorated with all his favourite things.

The cake is a coffee cake which I first covered with a dark chocolate ganache. Then I covered it in white fondant and added some gold ribbon round the bottom of the cake. The number 60 was made a week earlier from gumpaste. I was worried that gumpaste alone would not be strong enough to withstand the transportation process, so I used wire as well. I made gumpaste ropes and pushed wire into them. Then I bent the wired gumpaste ropes into the figures 6 and 0. I let them harden for a while, then dry dusted them with gold luster powder. It was quite messy, and I ended up with gold fingers!! :)


The cupcakes were Red Velvet cupcakes with cream cheese frosting. The cream cheese frosting recipe which I use has a high water content, (because I use cream) so the fondant decorations which I placed on top of the cream cheese frosting swirls started to melt!! 

I was horrified when my fondant discs started to melt and droop over the cupcakes!! But luckily they did not disintegrate totally and were still kind of acceptable, as long as I switched off my OCD mode!! lol!

Note to self: fondant on cream cheese frosting is a no no!

So my friend gave me a whole list of stuff  (fondant decor) I could put on the cupcakes. These included his children and grandchildren, and other things like cars and pets. I loaned her my cupcake stand, so the cake went on top and the cupcakes at the bottom. I do not have a photo of the final assembled display, but here are the pics I did take;


Related Posts with Thumbnails