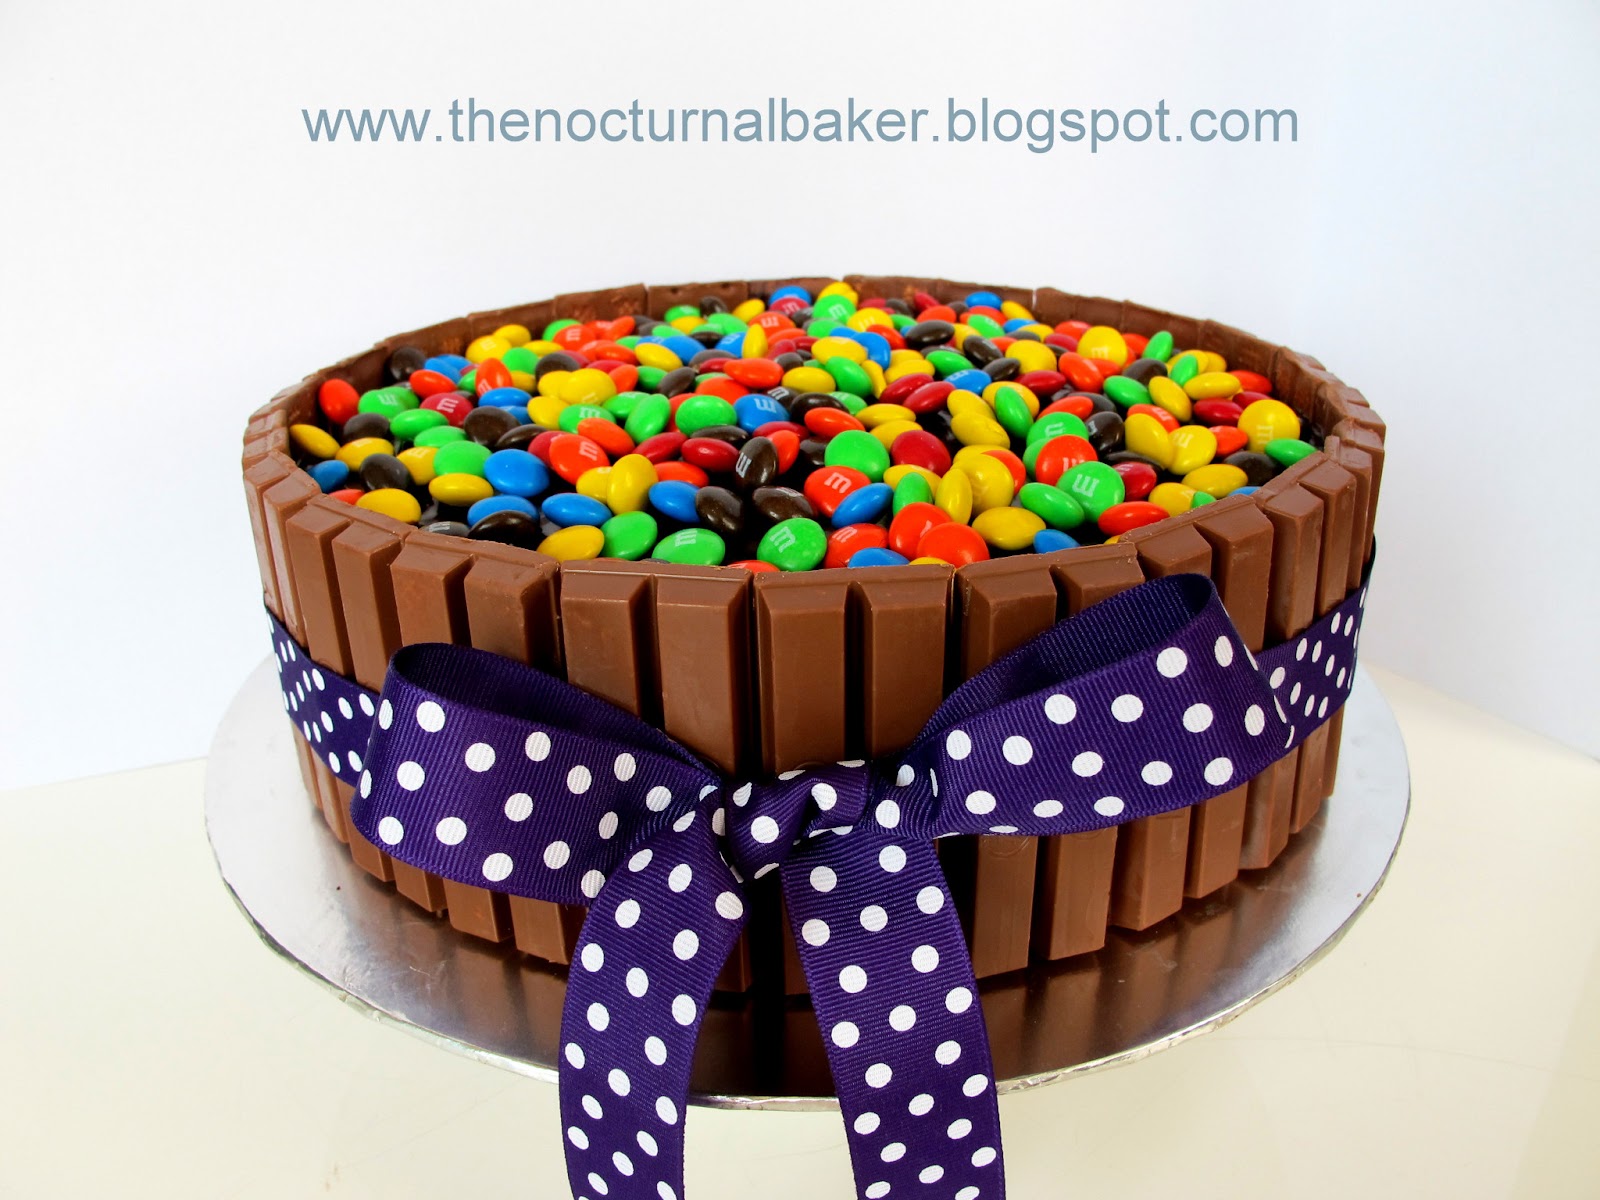
Kit Kat cakes can be found all over the internet. When I was looking for something easy to make, yet impressive, I decided the Kit Kat cake fitted the bill.
This was for my daughter Claire to bring to school for her birthday celebration. It was an 8" dark chocolate cake, covered with Belgian chocolate ganache! Then I stuck Kit Kats round the sides and topped it with plenty of M&Ms! A pretty purple polka-dot ribbon completed the look. It was a chocolate lover's dream come true!
I love the look of this cake! It makes kids and adults alike gasp in delight! And the taste? Chocolate nirvana....
So this was one of those rare orders which I did for a client whom I did not previously know. (Most of my cakes are for family and friends)
She wanted an Elmo cake, like the one I did previously, but a larger, two tier version.It was for her son's first birthday. First birthdays are always more special don't you think??
The last time I made an Elmo using rice krispies treats, I covered him with red royal icing. It was a pain to pipe all the red fur using a star tip. Just colouring the royal icing a deep red was already a headache. So this time I tried a different approach, which I must say turned out very well!
So I moulded Elmo's body, head and arms using rice krispies treats. Then I covered the pieces in red gumpaste and pieced them together using toothpicks and satay sticks. The resulting surface was bumpy, and it replicated fur very well! The eyes and nose were balls of gumpaste stuck on with water and more toothpicks.
It turned out to be quite a sturdy structure and I was very happy indeed!
So both tiers were chocolate cake and were quite heavy in the end. I am also quite happy with the ganaching on this cake. The surfaces were flat and edges sharp.
The no.1 and the ribbon curlicues were made from gumpaste and everything else was fondant. I think I've found the perfect way to make Elmo and don't mind making him again!
I made a Baby TV cake for my little nephew, Adam who turned one in April! I don't know much about Baby TV characters, but my sis said Adam loves Baby Tulli the most! Baby Tulli is apparently a purple slug, I think...
So I made a two tiered cake, the top tier was a 6" round dark chocolate cake and the bottom was an 8" round red velvet cake. I just covered the two tiers in Belgium chocolate ganache, because I thought the brown was a nice 'boy' colour! :)
The number 1 is also actually a Baby TV character. I had to put wires into the arms to give support.
The orange and yellow blobs are also characters from that channel! :)
I added a rainbow for a splash of colour.
Here's my Baby Tulli compared with the 'real' baby Tulli!
We celebrated Dad and Little Brother's birthday last week, so I baked them a birthday cake. I've been meaning to try making the Brownie Cheesecake from my new book; it's a chocolate, baked cheesecake with a dense brownie base. Doesn't that sound wonderfully sinful? I actually bought the required ingredients a long time ago and was supposed to make it for Christmas dinner, but eventually ended up not having enough time to do so.
So anyway, the cake turned out really delicious. I was a bit worried, because there is no way of testing if a cheesecake is done, unlike for normal cakes, you just stick a skewer into the centre. My oven is rather small and is also fan forced, so I think it usually requires a lower temperature than those stated in recipes. I usually test for doneness using the skewer method, rather than following the recipe's time given.
This time, I had to trust the recipe and just follow the time. So, to reduce the margin of error, I made sure I had the exact pan size stated in the recipe. I went out to buy a 10 inch spring form pan just for this cake.
After baking for the stated amount of time, the cheesecake layer was firm and didn't wiggle when I shook the pan, so I presumed it was okay. However, when we ate the cake, the brownie base was more like halfway between cookie dough and biscuit base than cake. You could feel the crunch of the sugar. Don't get me wrong, it was yummy and went well with the cheesecake layer, I'm just not sure if it's meant to be like that, or if I undercooked it or something...
Anyway, everyone liked it, so I'll still make it the same way the next time I try this. There should be a next time, if I'm not too lazy :)
So here's the recipe from my book. The method is really easy if you have a food processor, but I unfortunately do not. (Almost went out to buy one just for this!!) I just used a wooden spoon and plenty of elbow grease. I also left out the pecans because it's impossible to find any here!
Method:
Preheat the oven to 170 degrees Celsius. First make the base: put the pieces of butter, sugar, flour and cocoa into the bowl of a food processor and process until the mixture comes together to make a thick paste.
Tip this mixture into the prepared tin and press onto the base to make a thick, even layer. Chill while making the topping.
Break up the chocolate and put it in a heatproof bowl. Set the bowl over a pan of steaming water and melt gently, stirring frequently. Remove the bowl from the pan and stir until smooth. Leave for 5 minutes to cool.
Put the cream cheese, eggs, sugar and vanilla into the bowl of the food processor. Process until thoroughly combined, scraping down the sides from time to time.
With the machine running add the cream through the feed tube, followed by the melted chocolate. When completely mixed, pour the mixture onto the base and spread evenly. Finish by scattering over the pecans.
Stand the tin on a baking tray then bake in the preheated oven for 40 minutes until just firm. Turn off the oven but leave the cheesecake in the oven, without opening the door, to cool down.
Then remove the cheesecake from the oven and chill at least 4 hours (preferably overnight) before removing from the tin. Dust with cocoa and serve.
Store in an airtight container in the fridge and eat within 5 days.
I decorated it with some leftover ganache I had and practiced my awful piping skills. Thank goodness for colorful candles and ribbons which always prove so useful!
I made a chocolate ganache out of Cadbury's Old Gold Dark Chocolate which has 70% content of cocoa. It was luxuriously rich and delicious. The only thing is it isn't sweet, so if you prefer your ganache a little sweeter, you'll have to add a bit of sugar, or use a chocolate which has less cocoa content.
Bittersweet Chocolate Ganache Ingredients:
200g Cadbury's Old Gold Dark Chocolate (70% cocoa)
1 cup (250ml) whipping cream
Method:
break chocolate into small pieces
melt chocolate in a bowl fitted over a pan of simmering water
allow chocolate to melt without stirring
when completely melted, remove chocolate from heat
allow to cool slightly
beat cream into chocolate until well mixed
The consistency of the ganache hardens upon cooling. Therefore, if you want to cover a cake by pouring fondant over, you can do so while it is still slightly warm.
If you want to pipe the ganache however, you can refrigerate it awhile for it to firm up. Be sure to place a layer of cling film over the surface of the ganache to prevent a crust forming while in the fridge.
Trust me, if you love dark chocolate, you'llsimply adore this!
Hubby and I and Sis no.4 and her hubby got married on the same day on 27/12/00. So we recently celebrated our 9th anniversary.
I made a boy and a girl teddy bear from fondant. I used store bought fondant, so it was quite easy to handle. However, I added in the gum tragacanth a few days earlier, so it made the fondant a bit harder to work with. This explains the cracks which I couldn't, for the life of me, knead out without getting carpal tunnel syndrome.
I placed the cutie bears on a scalloped circle of white fondant and wrote 'Happy Anniversary' using a fine-tipped food marker.
The cakes are chocolate cake covered in dark chocolate ganache. I used Cadbury's Old Gold chocolate for the ganache and it was heavenly! For the mini cakes I piped on the ganache using the large star tip and just placed a jumbo heart sprinkle on top.
I made my first fondant cake on Friday. It was a chocolate brownie cake which turned out pretty much perfect for the first time because the butter was really room temperature (I usually use cold because I have no patience to wait for it to warm up!). I filled and iced it with chocolate ganache.
Then I made rolled fondant for the first time. It wasn't as hard as I imagined it would be, but it was still quite a bit of work. I tinted some yellow and rolled it out to cover the cake. It tore a bit when I lifted it up. I also got some ganache on my fingers and dirtied the fondant with the brown colour. I had to wipe it off with a damp cloth. I think I'll stick to white frosting the next time I'm using fondant.
I cut out some white daisies and flattened little yellow balls for the centres. Then I made a border of yellow balls. It turned out okay in the end, but I think I'm going to need much more practice to get the covering bit perfected.
I absolutely love food and I adore all things beautiful! So what else could possibly surpass gorgeously decorated cakes, cookies, pastries and such? They're beautiful, and even better, they're edible! Therefore, I have decided to teach myself baking and cake decorating and I shall document my attempts on this, my humble blog. Wish me luck!
Christmas party @ Tebedu
-
packing gifts - assembly line style
So every year, we help out at a church at Tebedu, which is near the
Indonesian border. We pack simple gifts, sponsore...
NO MORE ORDERS
-
*NOTICE*
DEAR ALL, I'M SORRY TO ANNOUNCE THAT DUE TO TIME CONSTRAINTS, I WILL NOT BE
TAKING ON ANYMORE ORDERS FOR THE MEANTIME.
CHEERS!!
PRISCILLA
Memories 2009-2010
-
May 2009: Chuo sisters learning to dive at Waterpark, BDC, Kuching.
2009: Talang-Talang Island, Kuching, Sarawak, Malaysia.
*2009:* Talang-Talang Island...