My daughter Annie volunteered me (without asking me first!) to make a cake for her teacher's birthday! It has been quite a while since I made a decorated cake, so I agreed anyway.
I used the Wilton gumpaste I had made previously, to create some flowers. I just cut a simple five petal flower and veined the petals and stuck on some pretty-coloured non pareils which I had just bought. Then I wired them and stuck them into the cake which I covered in white fondant and green and yellow stripes.
The cake is two layers of 6" round "Hershey's Perfectly Chocolate Cake", only I used Van Houten cocoa powder as opposed to Hershey's cocoa powder, because you just can't find that in my part of the world.
I decided to make chocolate cake because it's usually safest with kids. I chose the Hershey's recipe because it uses cooking oil instead of butter. I realized, last minute, that I was all out of butter! (I only had half a stick left which was just enough for the buttercream).
For the frosting, I just dumped together butter, icing sugar and cocoa powder. Just adjust the quantities until you get the taste and texture which you like.
I tried making gumpaste using the Wilton gumpaste recipe. Previously, I have just been using store bought soft fondant, and adding gum tragacanth to make it more pliable and to dry hard. The recipe looked simple enough, and I wanted to try and save some money by making my own because ready-made fondant is quite pricey here. I've been spending way too much money on this hobby of mine! :)
*Sigh*, how I wish we could get affordable soft fondant and even better, pre-dyed fondant here! Man, it would make my life soooo much easier!
So anyway, I used Wilton's gum tragacanth, called Gum Tex. The resulting gumpaste is indeed pliable and dries hard. It is similar to adding gum tragacanth to store bought fondant. I think it can be better though. If I were to make delicate flowers which require the gumpaste to be rolled out very thinly, I think I would need even softer, more pliable gumpaste. This batch would do for my modelling needs. However, I do intend to try gumpaste flowers soon, so I'll be looking around for more gumpaste recipes.
Here's the Wilton gumpaste recipe:
INGREDIENTS
1 lb icing sugar 1 tbsp Gum Tex 4 tbsp water 1 tbsp glucose water
METHOD
Sift the 3/4 of the sugar into mixing bowl. Add Gum Tex and mix well. Put water and glucose water into saucepan and warm until dissolved and well mixed.
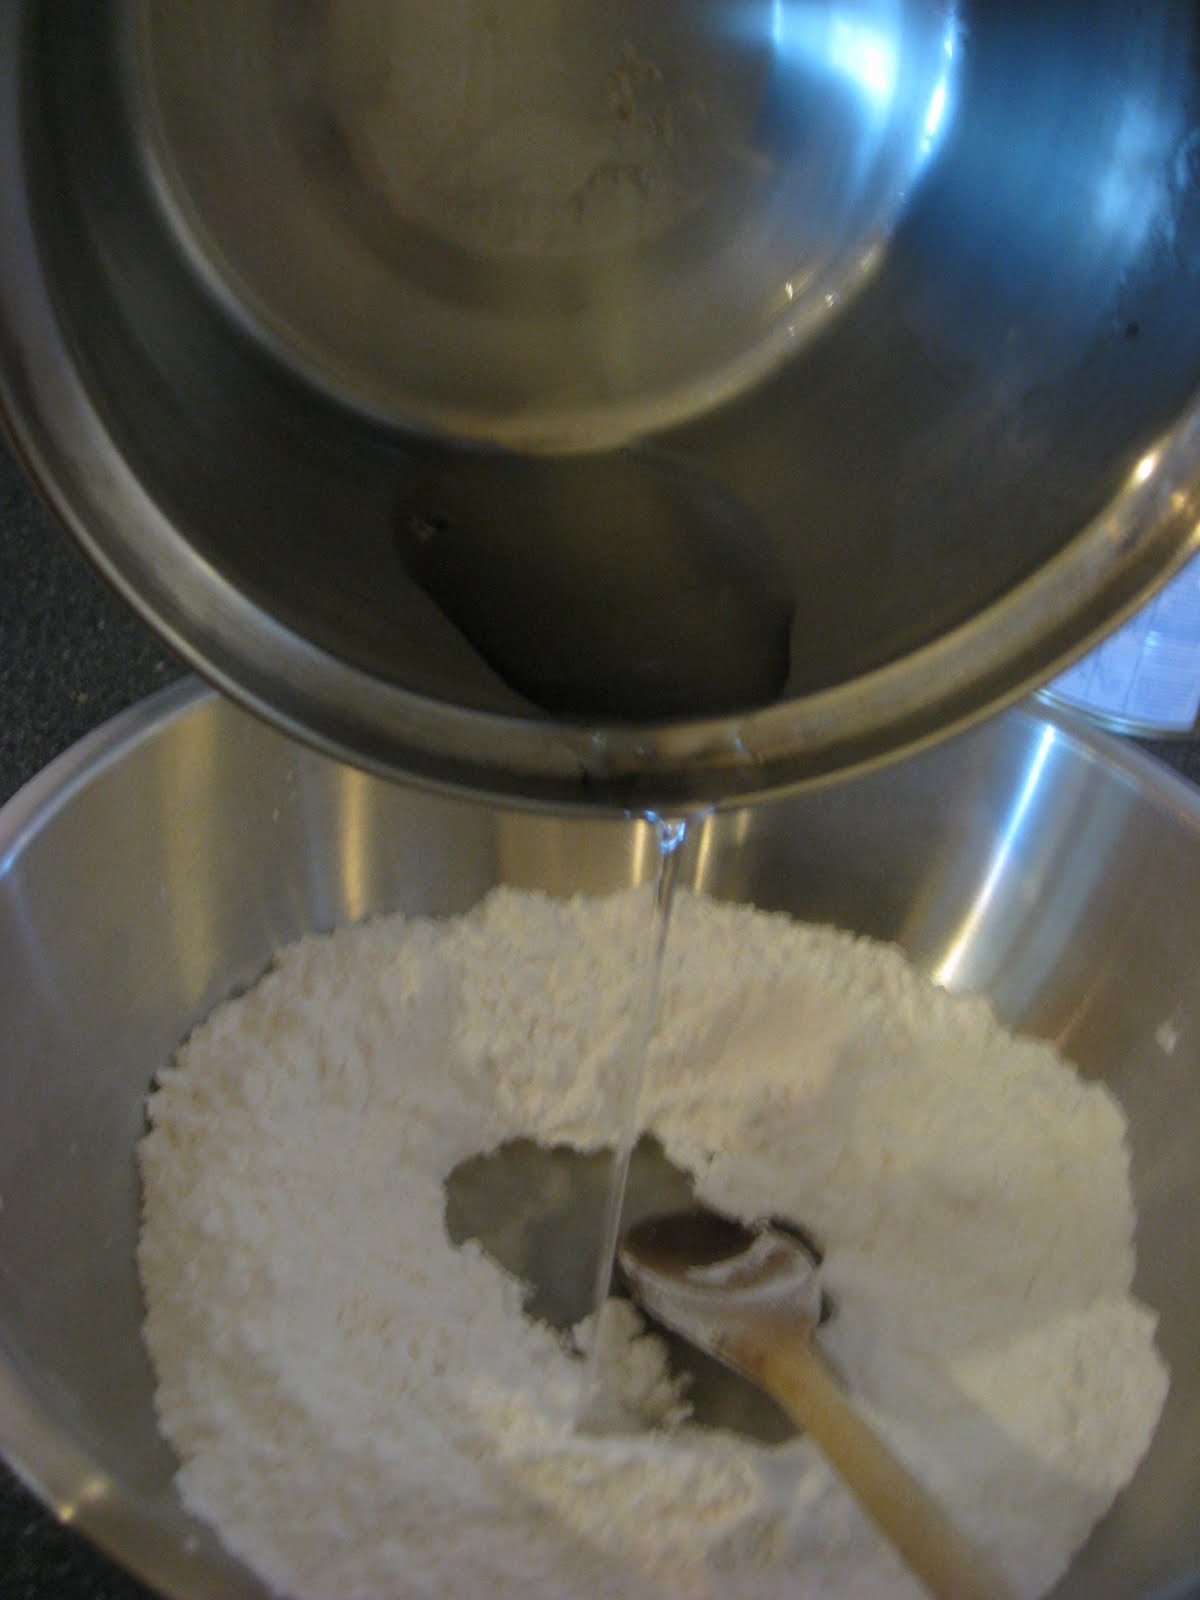
Make a well in the centre of mixing bowl and pour in liquid. Mix well.
Scrape mixture into plastic bag, seal and place in airtight container. Leave for 8 hours or more. The dough will be hard. Knead dough and add remaining sugar gradually. The dough will become white, soft and pliable.
Gumpaste can be kept for 2 weeks. If keeping for longer, place in refrigerator.
Here are the brownie muffins, as I promised in my last post. The recipe also comes from the book "Brownies" by Linda Collister. I thought muffins would be easier for the kids to bring to school, and also not having any nuts in them might score extra points with the kids.
These muffins are dreamy! They're rich and dense and packed with chocolate chips! I personally prefer brownie bars with nuts in them, but as far as muffins and cupcakes go, you can't get them 'brownie'er/ 'fudgy'er than these!!
The original recipe calls for 25g of plain chocolate chips and 25g of white chocolate chips. Since I didn't have any white chocolate chips at hand, I used all plain chocolate chips instead and also decided to double the amount required, cos I figured a little more chocolate never killed anyone! :) I'm a chocoholic, if you don't already know...
So anyway, here's the recipe:
Brownie Muffins
2 large eggs 125g light brown sugar 125g unsalted butter, melted 230ml milk 1/2 teaspoon vanilla essence 225g plain flour 50g cocoa powder 1/2 teaspoon baking powder 100g plain chocolate chips, plus extra to decorate a 12-cup muffin tray, lined with 12 papar cases
Preheat the oven to 180 degrees C (350 degrees F). Break the eggs into a mixing bowl, add the sugar and beat with a wooden spoon until thoroughly combined. Beat in the melted butter, followed by the milk and the vanilla.
Sift the flour, cocoa and baking powder onto the mixture and mix in. Finally, stir in the chocolate chips. Divide the mixture equally between the paper cases and sprinkle a few extra chocolate chips on the top of each muffin to decorate.
Bake in the preheated oven for about 20 to 25 minutes until just firm to the touch. The brownies will only rise slightly and won't resemble peaked muffins.
Remove from the oven and allow to cool on a wire cooling tray. Store in an airtight container and eat within 5 days. (not a problem)
I haven't baked for weeks, so last night, to get rid of the baking bug(and also because I didn't have anything for the kids to bring to school in the morning), I baked some pecan brownies as well as batch of brownie cupcakes (I'll put those in the next post).
I love my Linda Collister book, simply entitled, "Brownies". The ingredients and methods used are simple and straight-forward, yet yield glorious results! Besides, yummy, dense, fudgy brownies are a sure hit with just about anybody!
I had a packet of pecans which had been sitting around for a while, so I decided to make the 'Old-fashioned brownies' and replace the walnuts with pecans instead. Unfortunately, when I toasted my pecans in the oven, I managed to burn them (one of the many hazards of multi-tasking). Luckily I had some extra left, but it was less than the required amount, so my brownies turned out a little too sweet, because there were not enough nuts to balance out the sweetness.
The overall texture however was simply divine. When baking brownies and checking for doneness, it's always better to err on the undercooked side. Under-baked 'fudgy'ness is much preferred to over-baked dryness.
So, anyway, this is the recipe below, with the walnuts being replaced by pecans in the right amount (i.e.: not the amount I used!) :)
Oh yes, they are called old-fashioned because they use only cocoa powder, instead of plain chocolate and cocoa powder. That is how is was done, traditionally; only cocoa powder was used, to balance out the large amount of sugar required to produce the fudgy texture.
Old-fashioned Brownies
100g pecan pieces 4 large free-range eggs 300g castor sugar 140g unsalted butter, melted 1/2 teaspoon vanilla essence 140g plain flour 75g cocoa powder a 20.5cm x 25.5cm brownie tin, greased and base-lined (I just used a 9"x9" shallow tin)
Preheat the oven to 170 degrees C (325 degrees F). Put the pecan pieces in tray and lightly toast in the oven for about 8-10 minutes. (I strongly recommend you keep and eye on them!) Remove from the oven and leave to cool. Don't turn off the oven!
Meanwhile, break the eggs into a mixing bowl. Whisk until frothy, then whisk in the sugar. Whisk for a minute, then still whisking continuously, add the melted butter in a steady stream. Whisk for another minute, then whisk in the vanilla.
Sieve the flour and cocoa into the bowl and stir in with a wooden spoon. When thoroughly combined, stir in the nuts. Transfer the mixture to the prepared tin and spread evenly.
Bake in the preheated oven for about 25 minutes until a skewer inserted halfway between the sides and the centre comes out just clean. Remove the tin from the oven.
Leave to cool completely before removing from the tin and cutting into 16 pieces. Store in an airtight container and eat within 5 days. (They won't last that long, trust me...)
Did you guess Elmo? The eyes and nose were a dead giveaway right? :)
Anyway, quite a while back, a friend of mine requested that I make an Elmo cake for her son's 2nd birthday. I was reluctant at first, because I didn't have much confidence and did not want to ruin a little boy's second birthday by producing a lousy cake which looked horrible, or fell apart! It's different if it's your own children or nieces, and nephews... they're family and have to forgive you! hahaha :P
But since I love challenges, and my friend was giving me a lot of freedom to just make what I was comfortable with, I decided to forge ahead! There were some things which did not work out, but it still turned out pretty decent.
I'm happy I attempted this, because I love the resulting creation.
I had to start almost a week before the birthday party, because there are lots of parts which need days to dry out and harden.
First I made Elmo's body parts. I made his torso, head and arms from Rice Krispies and eyes and nose from gumpaste.
To make the Rice Krispies, you need 50g of marshmallows for every cup of Rice Krispies. You're supposed to microwave the mallows, but since I do not own a microwave oven, I melted them over the stove. Then you just stir in the Rice Krispies and when the mixture has cooled down, you mold them into the shapes you want and leave them overnight to dry hard. Mine were still a bit soft after a few days and even a couple of nights under air-conditioning! (might be due to not using a microwave)
I initially wanted Elmo's arms to reach upwards, but when I later tried to secure the arms in place by skewering them with toothpicks, they threatened to fall apart! So in the end I just glued the arms to Elmo's side with royal icing and prayed hard. I had to prop one arm with toothpicks while drying because it was coming apart! On hindsight, I think I will mold Rice Krispies over a wire frame in the future.
Gumpaste is just fondant with gum tragacanth added for extra firmness. It dries hard. I initially made Elmo's eyes and nose from Rice Krispies as well, but when I covered them with fondant, they were still really bumpy no matter how I rolled them. So, I had no choice but to make the whole thing from gumpaste. This made the front of Elmo's face very heavy when I attached them on later and it looked like Elmo's head was about to topple forward!! Horror of horrors!
I remedied this by sticking a long bamboo skewer down his head and right out the bottom. Before that he was only held up by short toothpicks. I think next time I try something like this, the torso or base should be made of something heavier like cake.
'Sigh'... I still have nightmares of Elmo's head rolling off in front of a bunch of kids!! I'm definitely going to use a lot of wires the next time I work with Rice Krispies. (This is the first time)
I also made a lot of other pieces earlier, the ones which needed to be hard and thus had to be made of gumpaste and not fondant. Everytime I had some free time, I would quickly make a few pieces. You really have to plan ahead for a large project such as this.
Anyway, next was to make red royal icing. I chose to use royal icing instead of buttercream because royal icing will survive transportation better. Royal icing, buttercream or even fondant, whatever icing it is, it is sooooo hard to make it super red or super black! Because of this, I am considering buying an airbrush!
I think I used half a small bottle of Wilton Christmas red, half a bottle of darker red and some black before I got an acceptable shade of red. Still not what I wanted initially, but it would do. Because of all this liquid in the form of food colouring, the royal icing was rather thin and took days and days under the air-cond to dry, and even then it was not totally hard and was crumbly.
I first stuck Elmo's head on with toothpicks and then glued on the arms with icing. Then I covered him with a layer of icing in case the lighter coloured Rice Krispies show through the "fur".
After sticking on the eyes and nose with more toothpicks, I began to pipe on the fur using a small star nozzle. Because the icing was a bit runny, the grooves of the star didn't really show, but that was okay. It made quite a natural 'gruffy' look. This fur piping was quite tedious work. It's another thing I've never tried before.
I prayed that Elmo's arm would stick and his fur would harden, and most of all he would not lose any body parts!!
After that, assembling the cake was the usual stuff. I baked two 9" square American chocolate cakes which I levelled, then crumb coated with chocolate buttercream.
During the morning of the party (luckily it was at night), I had to rush out to get a 12" cake board, a large cake box, candles and knife. I had run out and forgot to replenish.
Then I covered the cake in blue fondant and stuck everything else on.
I am a bit of a perfectionist and there are a few things which irritate me; 1. Elmo is slanting a bit, and is also looking slightly to the left. 2. his eyes are too big, making him look like he's suffering from hyperthyroidism. 3. his left arm looks dislocated. 4. he is "shedding fur" because the royal icing is too crumbly. (thus causing irritating red spots on my blue fondant!!)
Well, other than that, I think I did a great job. It was stressful yet fun... I really hope Little Jarod will be delighted! At the end of the day, that's where the most joy and satisfaction comes from when making children's cakes for their special day!
P/S: thanks to the friend who ordered the cake, I have so many photos of the whole process. She requested I capture it on film (can you still say that when it's digital??), which is what I usually intend to do, but always forget when I get too engrossed with the task at hand. (also my hands are usually covered in corn flour or Crisco, so right now my camera is a bit oily and quite fair!)
We celebrated Dad and Little Brother's birthday last week, so I baked them a birthday cake. I've been meaning to try making the Brownie Cheesecake from my new book; it's a chocolate, baked cheesecake with a dense brownie base. Doesn't that sound wonderfully sinful? I actually bought the required ingredients a long time ago and was supposed to make it for Christmas dinner, but eventually ended up not having enough time to do so.
So anyway, the cake turned out really delicious. I was a bit worried, because there is no way of testing if a cheesecake is done, unlike for normal cakes, you just stick a skewer into the centre. My oven is rather small and is also fan forced, so I think it usually requires a lower temperature than those stated in recipes. I usually test for doneness using the skewer method, rather than following the recipe's time given.
This time, I had to trust the recipe and just follow the time. So, to reduce the margin of error, I made sure I had the exact pan size stated in the recipe. I went out to buy a 10 inch spring form pan just for this cake.
After baking for the stated amount of time, the cheesecake layer was firm and didn't wiggle when I shook the pan, so I presumed it was okay. However, when we ate the cake, the brownie base was more like halfway between cookie dough and biscuit base than cake. You could feel the crunch of the sugar. Don't get me wrong, it was yummy and went well with the cheesecake layer, I'm just not sure if it's meant to be like that, or if I undercooked it or something...
Anyway, everyone liked it, so I'll still make it the same way the next time I try this. There should be a next time, if I'm not too lazy :)
So here's the recipe from my book. The method is really easy if you have a food processor, but I unfortunately do not. (Almost went out to buy one just for this!!) I just used a wooden spoon and plenty of elbow grease. I also left out the pecans because it's impossible to find any here!
Method:
Preheat the oven to 170 degrees Celsius. First make the base: put the pieces of butter, sugar, flour and cocoa into the bowl of a food processor and process until the mixture comes together to make a thick paste.
Tip this mixture into the prepared tin and press onto the base to make a thick, even layer. Chill while making the topping.
Break up the chocolate and put it in a heatproof bowl. Set the bowl over a pan of steaming water and melt gently, stirring frequently. Remove the bowl from the pan and stir until smooth. Leave for 5 minutes to cool.
Put the cream cheese, eggs, sugar and vanilla into the bowl of the food processor. Process until thoroughly combined, scraping down the sides from time to time.
With the machine running add the cream through the feed tube, followed by the melted chocolate. When completely mixed, pour the mixture onto the base and spread evenly. Finish by scattering over the pecans.
Stand the tin on a baking tray then bake in the preheated oven for 40 minutes until just firm. Turn off the oven but leave the cheesecake in the oven, without opening the door, to cool down.
Then remove the cheesecake from the oven and chill at least 4 hours (preferably overnight) before removing from the tin. Dust with cocoa and serve.
Store in an airtight container in the fridge and eat within 5 days.
I decorated it with some leftover ganache I had and practiced my awful piping skills. Thank goodness for colorful candles and ribbons which always prove so useful!
My niece Alaena celebrated her 5th birthday last Sunday. She's a pretty, young lady who loves looking beautiful! So I knew she would love a girly tiara cake full of sparkle and fluff!
I baked two round American Chocolate cakes. The bottom tier was 9" and the top was 6". I covered the tiers with purple and pink fondant.
The tiara is hand made from gumpaste. I initially intended to use a plastic toy tiara, but couldn't find one! I had no time to go around searching, because we were busy with house renovations and also a close friend's wedding. Thus, I made the tiara, without knowing if it would harden right and turn out okay. Luckily it turned out fine, though I had to use 3 toothpicks for extra support.
I also only had 2 hours to assemble the cake, as we had partied till 3-4am the night before, after the wedding dinner! Thank goodness for toothpicks; an essential and oh-so-flexible cake decorating tool! (If you look carefully you can see that the cake is also slanting a bit! I had no time to rectify that!)
The whole cake is edible except for the toothpicks, the pink fur trim at the bottom, and the dowel rods in the bottom tier which is used to support the top tier.
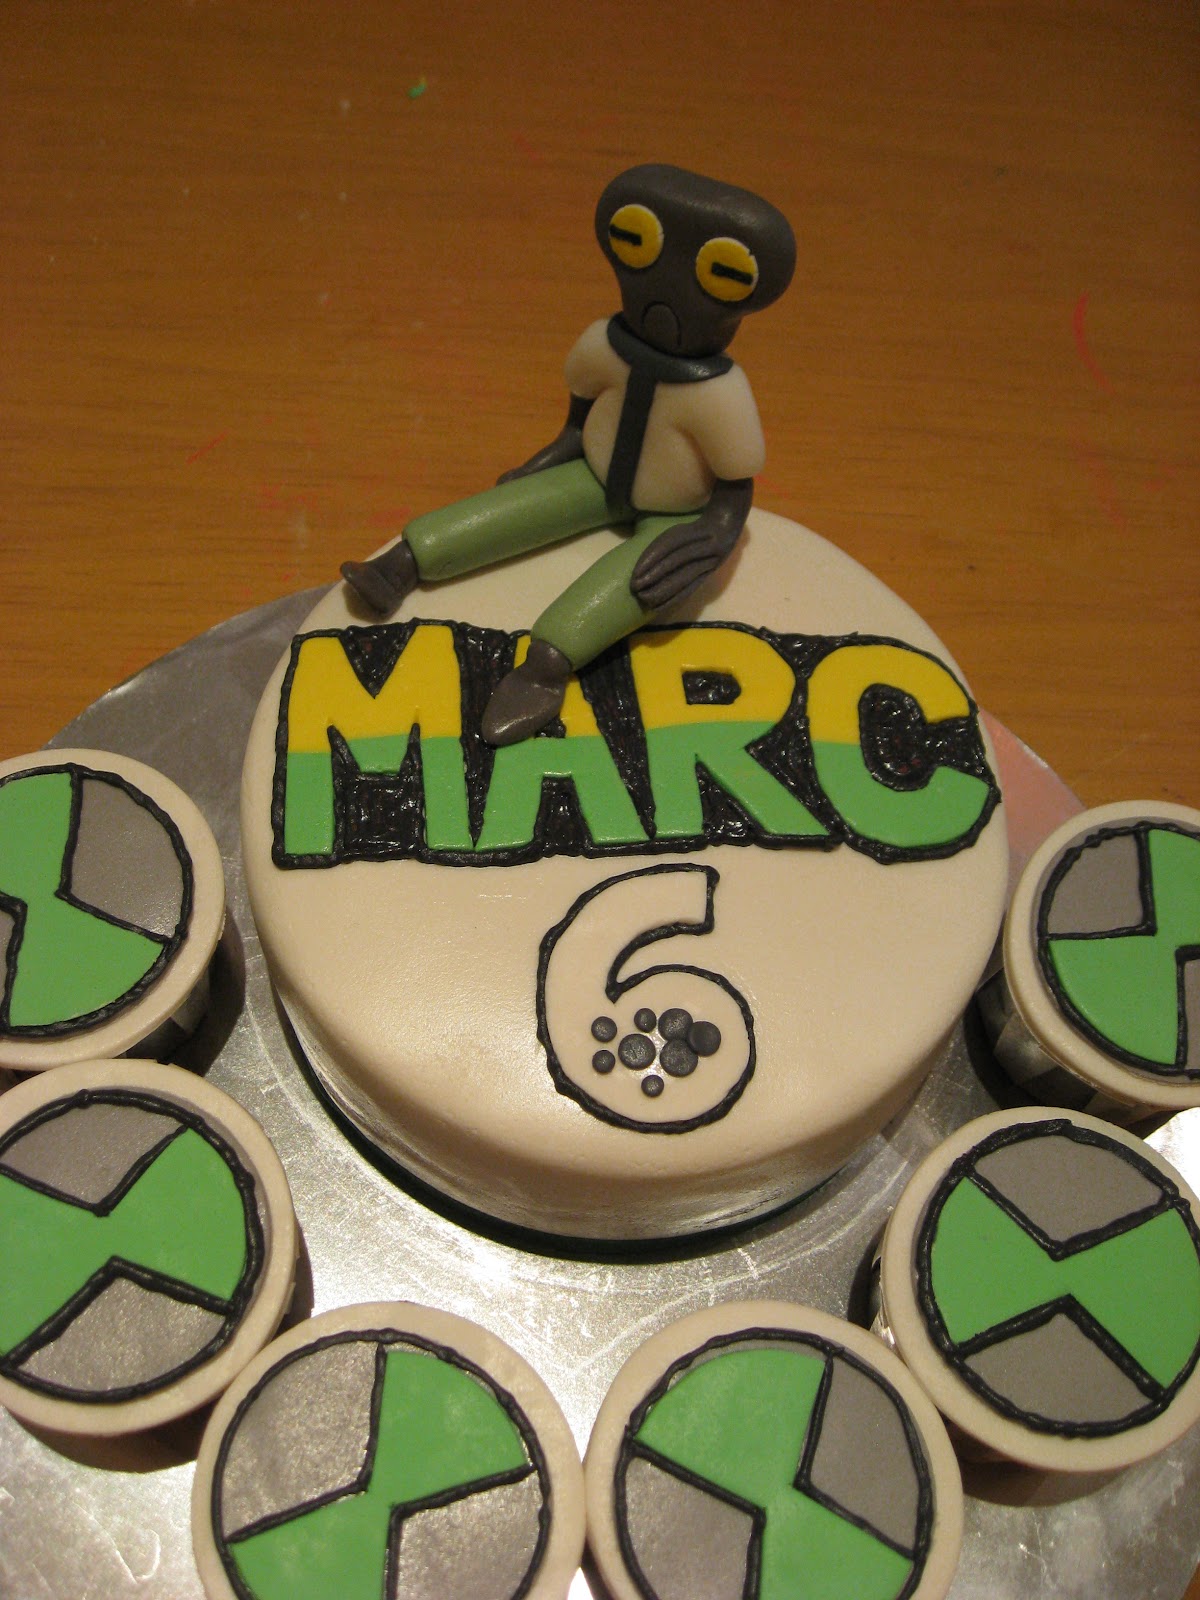
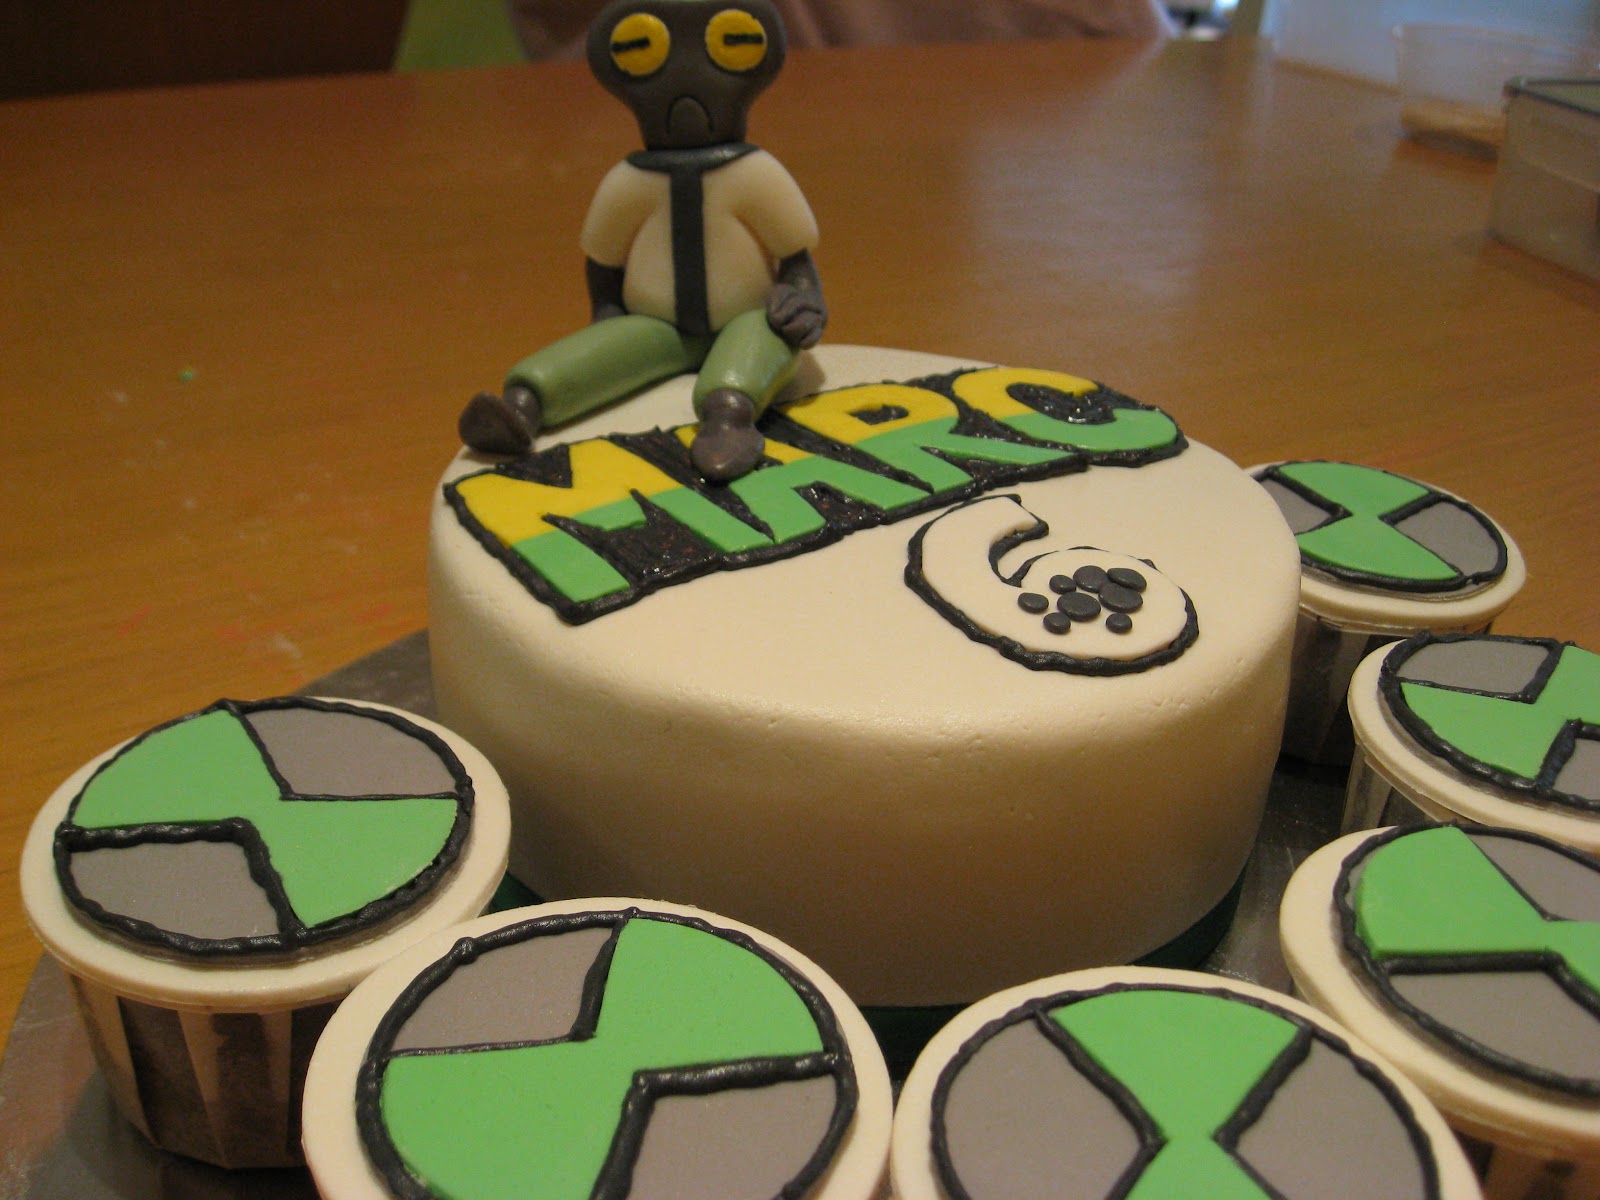
My nephew Marc celebrated his 6th birthday on Sunday. I seldom make cakes for boys, because my children and my sisters' children are mostly girls! The girls outnumber the boys by 2:1!
So anyway, Marc loves Ben 10, so I went on the internet to find some Ben 10 related pictures.
The kids tell me this guy is called "Grey Matter". He's one of the aliens Ben 10 can turn into. I just picked him because he's the easiest to make!! The others have too many arms, eyes, e.t.c.! I made this guy from fondant and he has a toothpick in him for a little support. For the eyes, I had the help of my handy food markers.
I made a 6 inch round chocolate cake, which I covered in white fondant. I wrote "Marc 6" instead of "Ben 10" by cutting fondant free-hand. The black outlines and filling-in was done with royal icing, because I find tinting fondant black is just too much hard work!
I also made 6 chocolate cupcakes and covered them with a simple fondant 'omnitrix' design. One for each candle.
I made a chocolate ganache out of Cadbury's Old Gold Dark Chocolate which has 70% content of cocoa. It was luxuriously rich and delicious. The only thing is it isn't sweet, so if you prefer your ganache a little sweeter, you'll have to add a bit of sugar, or use a chocolate which has less cocoa content.
Bittersweet Chocolate Ganache Ingredients:
200g Cadbury's Old Gold Dark Chocolate (70% cocoa)
1 cup (250ml) whipping cream
Method:
break chocolate into small pieces
melt chocolate in a bowl fitted over a pan of simmering water
allow chocolate to melt without stirring
when completely melted, remove chocolate from heat
allow to cool slightly
beat cream into chocolate until well mixed
The consistency of the ganache hardens upon cooling. Therefore, if you want to cover a cake by pouring fondant over, you can do so while it is still slightly warm.
If you want to pipe the ganache however, you can refrigerate it awhile for it to firm up. Be sure to place a layer of cling film over the surface of the ganache to prevent a crust forming while in the fridge.
Trust me, if you love dark chocolate, you'llsimply adore this!
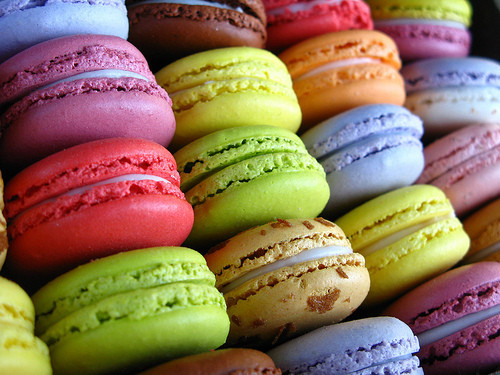
Gosh! Look at these? Aren't they the most precious cookies you've ever seen? The gorgeous colours and the perfectly smooth round mounds are simply exquisite! I found this pic from www.champagnemacarons.blogspot.com.
No, of course I did not make these perfect creations! They're just so breath-taking I wanted to share with my fellow sweets junkies. You can get the recipe here if you want to have a go.
These are macarons, a french almond cookie. From what I've read, they are rather challenging to make. But they're just so beautiful, I absolutely have to try making them one day.
When I do work up the courage, I will make them and you'll definitely see it here... unless of course they end up looking like blobs of poop, then I'll just pretend I never tried!! :P
I absolutely love food and I adore all things beautiful! So what else could possibly surpass gorgeously decorated cakes, cookies, pastries and such? They're beautiful, and even better, they're edible! Therefore, I have decided to teach myself baking and cake decorating and I shall document my attempts on this, my humble blog. Wish me luck!
Christmas party @ Tebedu
-
packing gifts - assembly line style
So every year, we help out at a church at Tebedu, which is near the
Indonesian border. We pack simple gifts, sponsore...
NO MORE ORDERS
-
*NOTICE*
DEAR ALL, I'M SORRY TO ANNOUNCE THAT DUE TO TIME CONSTRAINTS, I WILL NOT BE
TAKING ON ANYMORE ORDERS FOR THE MEANTIME.
CHEERS!!
PRISCILLA
Memories 2009-2010
-
May 2009: Chuo sisters learning to dive at Waterpark, BDC, Kuching.
2009: Talang-Talang Island, Kuching, Sarawak, Malaysia.
*2009:* Talang-Talang Isla...