Thursday, July 29, 2010

Who lives in a pineapple under the sea?


SPONGEBOB SQUAREPANTS!

Absorbent and yellow and porous is he.


SPONGEBOB SQUAREPANTS!


Don't you just love Spongebob and Patrick and all that nautical nonsense? I know I do! :) I made this cake for my daughter Claire's 5th birthday, for her to bring to school. There will be another one for her this Sunday when we have a party to celebrate the birthdays of kids nos.2, 3, and 4! So there will actually be 3 cakes, but I'm only making two, as one of them will be store-bought.

The cake is plain madeira with strawberry filling and a butter cream crumb coat. It is covered with fondant and Spongebob's nose, limbs and shoes are made of gumpaste.

I wanted big googly, innocent, eyes, so I gave him big irises and made sure to add in the reflections, i.e.: the white dots. Also as I'm a stickler for detail, I even put on the stripes for his socks!


I love this cake, one of my favourite to date. The only minor detail that bugs me is that the legs are a bit too small. I had no choice because I was running out of space! :)

Oh well, on to the next two cakes for this Sunday! Will keep you updated!

Sunday, June 27, 2010

Fondant fun


Hidey ho! I'm Henrietta the Hippo!

My niece Amelie specifically requested for a pink hippo for her 3rd birthday! I didn't have time to make her a whole cake because her birthday was the day after my huge wedding cake project. It was also her sister, Amanda's birthday!


So I just made her a pink hippo to put on top of her bought cake and let Amanda make her own fondant teddy bear. The other kids also joined in the fun and helped create this one of a kind masterpiece!


We also celebrated Father's Day a week earlier since Big Sis. was home. I made a simple fondant cake from the extra orange madeira cake I had leftover from the wedding cake project. We then topped it with an octopus Annie made and jammed on some gumpaste decorations leftover from previous projects.


Happy Falker Satherhood everyone! :)

(If that didn't make sense... go here!)

Friday, June 18, 2010

My First Wedding Cake!!


Phew! I'm so proud to have completed my very first wedding cake last Saturday!

I must thank my friend Michelle for having such confidence in me that she let me make her wedding cake! I mean it's not like a birthday cake, which one has annually... it's a once-in-a-lifetime wedding cake!!

Fortunately this was her second wedding dinner, which was held at our hometown. The main dinner was the more lavish affair and was held in KL. So that took a bit of pressure off me; at least she already had a nice professionally-made cake in the first event, so if mine didn't turn out too good, it wouldn't matter as much! Well, that was my reasoning anyway...

When Hubby and I came back from our diving holiday to Sipadan, I had only one week left to complete the huge (on my scale; mammoth!) project.

Over the week, I baked many cakes and made plenty of chocolate buttercream. The cake baking was the most time consuming, because I only have one wee oven, and had to bake them one at a time. The 12" cake tray almost couldn't fit into my oven!


So anyway, the bottom tier was two 12" round American chocolate cakes. The second tier was a 10" round American chocolate cake. The third, extra-wide tier, was three 8" round orange madeira cakes. The final top tier was made of styrofoam because I did not want my nightmares of the wedding cake crashing down to come true! I seriously doubted my engineering skills, so even though I always prefer my whole creation to be edible, I had to compromise this time. There was too much at stake!

The two separators were also made from styrofoam and covered in yellow gumpaste. I cut all the styrofoam used by hand, with the aid of a craft knife. It was a lot of hard, messy work, and if I ever do this professionally, I am definitely getting a styrofoam cutter machine thingy!!

So over the week, I cut the styrofoam parts and covered them in gumpaste first, then baked the cakes whenever I had some free time and lastly covered the cakes in fondant. I was doing the fondant decorating right up to a couple of hours before the wedding dinner. Then Hubby and I went early to set up the tiers and to put the finishing touches, i.e.: the real orchids.


I did try making a gumpaste orchid, but it was so much work and too time-consuming that I decided to use real ones. I figured mother nature was a better artist and since we have orchids in abundance here, it would actually be a shame to use fake ones!

During the dinner that night, I was still struggling to push thoughts of wedding cake avalanches out of my mind. Boy was I so totally relieved when the couple finally cut the cake without any untoward incidents!! The cake was then safely disassembled and served to guests.

I must also say here that I couldn't have done it without Hubby's help! He came back one night after a World Cup session to find me frantically fussing over the extra-wide tier! I had covered it in fondant and it cracked and tore at the edges! I was in despair! I did not have the energy nor the extra fondant to redo it and neither could I leave it as it was! Thank goodness Hubby came up with a solution which saved the cake and did not use up too much more fondant!

He also helped me lug the pieces to the car and to the banquet hall. They were quite big and surprisingly heavy! Also not forgetting the words of encouragement which helped prevent me from going insane! :)

*muaks* Thanks Darling!

This design was inspired by one done by The Pink Cake Box. I love the colours and the extra-wide tiers and the floating tiers effect caused by the styrofoam separators. I went through so many designs and in the end, even though this one was tougher to make due to the wide tier, I knew it was extra special. I checked with Michelle and sure enough, she loved it too.

So here it is, my very first (and also very likely my last!) wedding cake!!

In the end I don't think a lot of people even noticed the cake, because it was sitting on the side of the stage in the dim romantic lighting.

But I don't mind. I loved it and the bride loved it, so, "Mission accomplished!!"

Tuesday, May 25, 2010

Lollipop cake


I made this cake for my niece Allyson's 9th birthday. It looks pretty okay here, but after transporting it to my Dad's house where the party was held, it started melting in the crazily hot and humid weather!

The fondant went all wet and soft and started sliding down the sides! It was awful. I had no choice but to pop it into the refrigerator and took it out just minutes before it was time to cut it. Once you put a fondant cake into the fridge, it's destroyed, because when you take it out, the sudden temperature change will cause condensation on the fondant surface. The fondant will then absorb this moisture and turn into gunk!

So anyway, luckily it was still reasonably presentable when it was candle-blowing time.


The lollies are not real lollies. I made them from gumpaste a few days ahead. I just twisted ropes of coloured gumpaste with ropes of white gumpaste and rolled the rope up into spirals. Then I stuck in disposable chopsticks. These were left to harden for a few days.


The cake was a plain madeira cake with custard filling. I think that was another mistake, to have a water based filling like custard instead of an oil based one like butter cream. The fondant must have also absorbed the water from the custard. Thus, the resulting gloppy glue.

The birthday girl is one of those rare kids who is not fond of chocolate!! That's why I came up with the madeira cake with custard filling. I think I'll just stick to good ol' chocolate cake with chocolate butter cream in the future!

Friday, May 21, 2010

Annie's 9th Birthday


Thursday was my eldest daughter Annie's birthday. She has always wanted to help me in decorating cakes, but I never allowed her to. So, I promised that she could decorated her own birthday cake when the time came.


I made a simple, plain, two-tiered cake. It was chocolate cake with chocolate buttercream filling. The top tier I covered in pale green fondant and the bottom tier was light pink. Then, I made a border of white gumpaste daisies.


Annie decided to add a few gumpaste butterflies which I had made earlier. Then she piped her name and some patterns using a tube of blue sparkling gel icing.


I do believe she enjoys cake decorating as much as her Mummy! :)

Monday, May 3, 2010

Pika... Pika... Pikachu!


My nephew Timothy celebrated his 11th birthday yesterday. He has a huge collection of Pokemon cards, so I thought he would appreciate a Pokemon cake!


I chose to make Pikachu, because he is the most well-loved one and more importantly because he is blob-shaped!! Hehehe, that meant he would be easy to make!


I didn't have a very good experience using Rice Krispies to make models, so this time I tried using cake instead. I find that cake is much easier to work with, and the only disadvantage would be it's weight. Therefore I made sure to use lots of support in the bottom base cake, lest the whole thing caved in!

The inside of Pikachu is carrot cake which I bought because I was too lazy to make so much cake! I first made a cylindrical shape by layering small circles of cake and then gradually carved out a rough shape of Pikachu. I then covered him in yellow fondant and used tinted fondant to make his facial features and stripes.

His appendages, i.e: tail, ears and limbs, were all made from gumpaste ahead of time. They were left to dry and harden for a couple of days. I stuck them on with the help of toothpicks. I had trouble with the tail which was heavy and sticking out at an angle. In the end, I resorted to using an external bamboo skewer. It didn't look too good, but at least Pikachu had a tail!


The tips of his ears I painted black, using food colouring diluted with a bit of alcohol based vanilla essence. The bottom of his tail was painted the same way, with brown. The base cake, I covered with red and white, which is the colour of the ball thingie from which these cute monsters emerge!

The base cake was banana cake which I did bake, and frost with bittersweet chocolate buttercream. It wasn't very popular with the kids, so I suppose I'll just stick to boring old chocolate cake next time.

Wednesday, April 28, 2010

Flower cake


My daughter Annie volunteered me (without asking me first!) to make a cake for her teacher's birthday! It has been quite a while since I made a decorated cake, so I agreed anyway.

I used the Wilton gumpaste I had made previously, to create some flowers. I just cut a simple five petal flower and veined the petals and stuck on some pretty-coloured non pareils which I had just bought. Then I wired them and stuck them into the cake which I covered in white fondant and green and yellow stripes.


The cake is two layers of 6" round "Hershey's Perfectly Chocolate Cake", only I used Van Houten cocoa powder as opposed to Hershey's cocoa powder, because you just can't find that in my part of the world.

I decided to make chocolate cake because it's usually safest with kids. I chose the Hershey's recipe because it uses cooking oil instead of butter. I realized, last minute, that I was all out of butter! (I only had half a stick left which was just enough for the buttercream).

For the frosting, I just dumped together butter, icing sugar and cocoa powder. Just adjust the quantities until you get the taste and texture which you like.

Voila! A cake for teacher!

Tuesday, April 27, 2010

Wilton Gumpaste

I tried making gumpaste using the Wilton gumpaste recipe. Previously, I have just been using store bought soft fondant, and adding gum tragacanth to make it more pliable and to dry hard. The recipe looked simple enough, and I wanted to try and save some money by making my own because ready-made fondant is quite pricey here. I've been spending way too much money on this hobby of mine! :)

*Sigh*, how I wish we could get affordable soft fondant and even better, pre-dyed fondant here! Man, it would make my life soooo much easier!

So anyway, I used Wilton's gum tragacanth, called Gum Tex. The resulting gumpaste is indeed pliable and dries hard. It is similar to adding gum tragacanth to store bought fondant. I think it can be better though. If I were to make delicate flowers which require the gumpaste to be rolled out very thinly, I think I would need even softer, more pliable gumpaste. This batch would do for my modelling needs. However, I do intend to try gumpaste flowers soon, so I'll be looking around for more gumpaste recipes.

Here's the Wilton gumpaste recipe:


INGREDIENTS


1 lb icing sugar
1 tbsp Gum Tex
4 tbsp water
1 tbsp glucose water


METHOD


Sift the 3/4 of the sugar into mixing bowl.
Add Gum Tex and mix well.
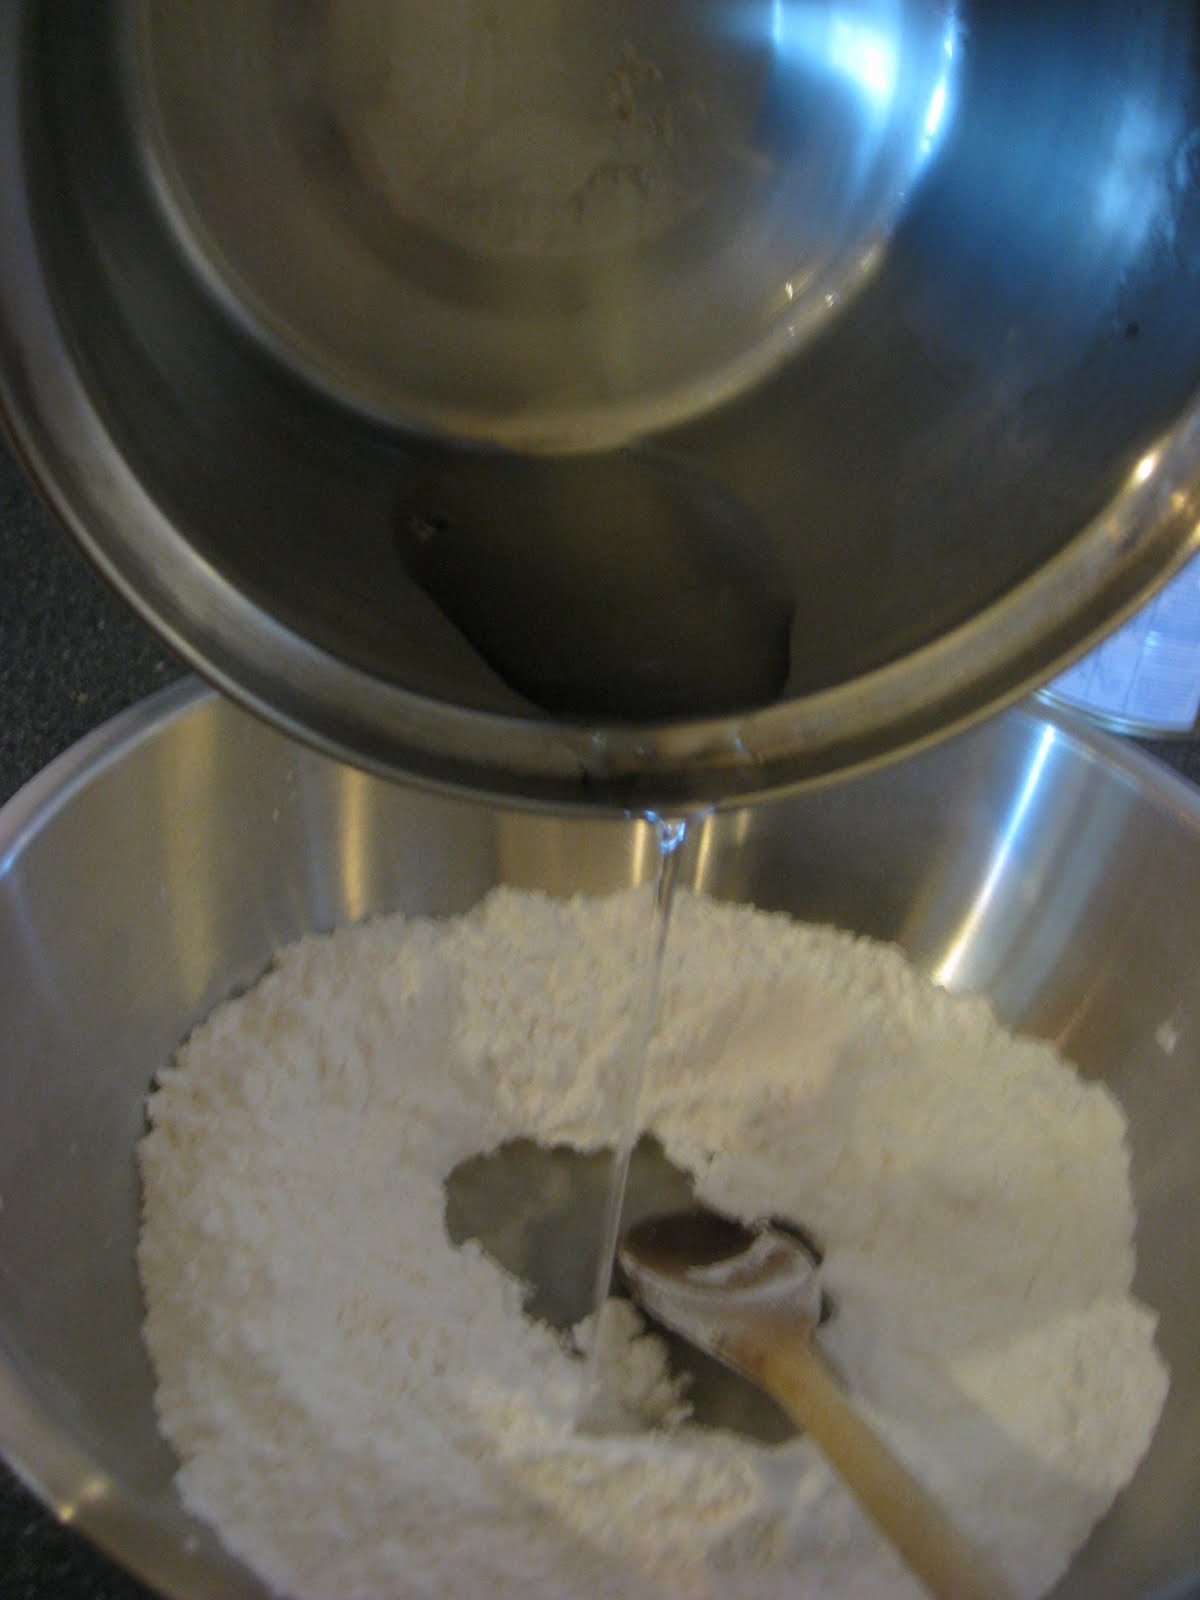
Put water and glucose water into saucepan and warm until dissolved and well mixed.

Make a well in the centre of mixing bowl and pour in liquid.
Mix well.


Scrape mixture into plastic bag, seal and place in airtight container.
Leave for 8 hours or more.
The dough will be hard.
Knead dough and add remaining sugar gradually.
The dough will become white, soft and pliable.


Gumpaste can be kept for 2 weeks. If keeping for longer, place in refrigerator.

Thursday, April 15, 2010

Brownie Muffins


Here are the brownie muffins, as I promised in my last post. The recipe also comes from the book "Brownies" by Linda Collister. I thought muffins would be easier for the kids to bring to school, and also not having any nuts in them might score extra points with the kids.

These muffins are dreamy! They're rich and dense and packed with chocolate chips! I personally prefer brownie bars with nuts in them, but as far as muffins and cupcakes go, you can't get them 'brownie'er/ 'fudgy'er than these!!

The original recipe calls for 25g of plain chocolate chips and 25g of white chocolate chips. Since I didn't have any white chocolate chips at hand, I used all plain chocolate chips instead and also decided to double the amount required, cos I figured a little more chocolate never killed anyone! :) I'm a chocoholic, if you don't already know...

So anyway, here's the recipe:


Brownie Muffins

2 large eggs
125g light brown sugar
125g unsalted butter, melted
230ml milk
1/2 teaspoon vanilla essence
225g plain flour
50g cocoa powder
1/2 teaspoon baking powder
100g plain chocolate chips,
plus extra to decorate
a 12-cup muffin tray, lined with 12 papar cases

Preheat the oven to 180 degrees C (350 degrees F).
Break the eggs into a mixing bowl, add the sugar and beat with a wooden spoon until thoroughly combined.
Beat in the melted butter, followed by the milk and the vanilla.

Sift the flour, cocoa and baking powder onto the mixture and mix in.
Finally, stir in the chocolate chips.
Divide the mixture equally between the paper cases and sprinkle a few extra chocolate chips on the top of each muffin to decorate.

Bake in the preheated oven for about 20 to 25 minutes until just firm to the touch.
The brownies will only rise slightly and won't resemble peaked muffins.

Remove from the oven and allow to cool on a wire cooling tray.
Store in an airtight container and eat within 5 days. (not a problem)

Wednesday, April 14, 2010

Pecan Brownies


I haven't baked for weeks, so last night, to get rid of the baking bug(and also because I didn't have anything for the kids to bring to school in the morning), I baked some pecan brownies as well as batch of brownie cupcakes (I'll put those in the next post).

I love my Linda Collister book, simply entitled, "Brownies". The ingredients and methods used are simple and straight-forward, yet yield glorious results! Besides, yummy, dense, fudgy brownies are a sure hit with just about anybody!


I had a packet of pecans which had been sitting around for a while, so I decided to make the 'Old-fashioned brownies' and replace the walnuts with pecans instead. Unfortunately, when I toasted my pecans in the oven, I managed to burn them (one of the many hazards of multi-tasking). Luckily I had some extra left, but it was less than the required amount, so my brownies turned out a little too sweet, because there were not enough nuts to balance out the sweetness.

The overall texture however was simply divine. When baking brownies and checking for doneness, it's always better to err on the undercooked side. Under-baked 'fudgy'ness is much preferred to over-baked dryness.

So, anyway, this is the recipe below, with the walnuts being replaced by pecans in the right amount (i.e.: not the amount I used!) :)

Oh yes, they are called old-fashioned because they use only cocoa powder, instead of plain chocolate and cocoa powder. That is how is was done, traditionally; only cocoa powder was used, to balance out the large amount of sugar required to produce the fudgy texture.


Old-fashioned Brownies

100g pecan pieces
4 large free-range eggs
300g castor sugar
140g unsalted butter, melted
1/2 teaspoon vanilla essence
140g plain flour
75g cocoa powder
a 20.5cm x 25.5cm brownie tin, greased and base-lined (I just used a 9"x9" shallow tin)

Preheat the oven to 170 degrees C (325 degrees F).
Put the pecan pieces in tray and lightly toast in the oven for about 8-10 minutes. (I strongly recommend you keep and eye on them!)
Remove from the oven and leave to cool.
Don't turn off the oven!

Meanwhile, break the eggs into a mixing bowl.
Whisk until frothy, then whisk in the sugar.
Whisk for a minute, then still whisking continuously, add the melted butter in a steady stream.
Whisk for another minute, then whisk in the vanilla.

Sieve the flour and cocoa into the bowl and stir in with a wooden spoon.
When thoroughly combined, stir in the nuts.
Transfer the mixture to the prepared tin and spread evenly.

Bake in the preheated oven for about 25 minutes until a skewer inserted halfway between the sides and the centre comes out just clean.
Remove the tin from the oven.

Leave to cool completely before removing from the tin and cutting into 16 pieces.
Store in an airtight container and eat within 5 days. (They won't last that long, trust me...)
Related Posts with Thumbnails